Unit 17: Audio Production Processes and Techniques - Capture Environment
Scenario - As part of an interview process you have been asked by a prospective employer to submit a portfolio of recordings from a variety of different sources and acoustic environments as evidence of your technical abilities.
Task:
Create a portfolio of recordings, report and recording log with track sheets. Report to include information on the following areas:
- Audio Capture: Studio and outside broadcast; Interviews; atmosphere; Live Performances and Conferences; monologue; dialogue; Group Debate; Audience Interaction; Participation.
- Microphone types and characteristics: Dynamic; Capacitor; electric condenser; ribbon; carbon; crystal hand-held; Stand; Tie-clip; Rifle; Boom; Associated Polar diagrams (omni, cardioid, hyper- cardioid); Radio Microphones.
- Pre-recorded sources: DVD; CD; Tape; Hard disk; MiniDisc sound file formats e.g. MP3; File conversion; as-live recordings; live recordings; concerts; Interview material; Commentary; Library material
- Recording Equipment: Interfaces; Cables and gain stages; Mixer inputs and outputs; signal flow and levels; metering and monitoring; The integrity of the sound signal; Direct Injection; Multi-track; stereo and single track recording; analogue recording; digital recording; Linear; Non-Linear; CD; DVD; Hard Disk
Make use of diagrams and technical information where appropriate.
Audio Capture:
Studio and Outside Broadcast:
Studio -
A television studio is an installation in which video productions take place, either for the recording of live television to video tape, or for the acquisition of raw footage for post-production. The design of a studio is similar to, and derived from, movie studios, with a few amendments for the special requirements of television production. A professional television studio generally has several rooms, which are kept separate for noise and practicality reasons. These rooms are connected via intercom, and personnel will be divided among these workplaces.
Studio Floor -
Outside -
Outside Broadcast ("OB") refers to any television or radio programme which is broadcast from a location away from the normal studio setting. The location doesn't actually have to be out-of-doors — the "outside" simply means "outside the studio".
Studio -
A television studio is an installation in which video productions take place, either for the recording of live television to video tape, or for the acquisition of raw footage for post-production. The design of a studio is similar to, and derived from, movie studios, with a few amendments for the special requirements of television production. A professional television studio generally has several rooms, which are kept separate for noise and practicality reasons. These rooms are connected via intercom, and personnel will be divided among these workplaces.
Studio Floor -
The studio floor is the actual stage on which the actions that will be recorded and viewed take place. A studio floor has the following characteristics and installations:
- decoration and/or sets
- professional video camera (sometimes one, usually several) on pedestals
- microphones
- stage lighting rigs and the associated controlling equipment.
- several video monitors for visual feedback from the production control room (PCR)
- a small public address system for communication
- a glass window between PCR and studio floor for direct visual contact is usually desired, but not always possible
While a production is in progress, people composing a television crew work on the studio floor.
- the on-screen "talent" themselves, and any guests - the subjects of the television show.
- a floor manager, who has overall charge of the studio area stage management, and who relays timing and other information from the television director.
- one or more camera operators who operate the professional video cameras, though in some instances these can also be operated from the PCR using remotely controlled robotic pan tilt zoom camera (PTZ) heads.
- possibly a teleprompter operator, especially if this is a live television news broadcast
Production Control Room -
The studio control room (SCR) is the place in a television studio in which the composition of the outgoing program takes place. (An SCR is also often the acronym for the Satellite Control Room; from here TV feeds are sent to and received from the local satellite used by the TV station.) The production control room is occasionally also called a studio control room (SCR) or a "gallery" – the latter name comes from the original placement of the director on an ornately carved bridge spanning the BBC's first studio at Alexandra Palace, which was once referred to as like a minstrels' gallery. Master control is the technical hub of a broadcast operation common among most over-the-air television stations and television networks. Master control is distinct from a PCR in television studios where the activities such as switching from camera to camera are coordinated. A transmission control room (TCR) is usually smaller in size and is a scaled-down version of central casting.
Master Control Room -
The master control room (MCR) houses equipment that is too noisy or runs too hot for the production control room (PCR). It also makes sure that coax cable and other wire lengths and installation requirements keep within manageable lengths, since most high-quality wiring runs only between devices in this room. This can include the actual circuitry and connections between
- character generator (CG)
- camera control units (CCU)
- digital video effects (DVE)
- video servers
- vision mixer (video switcher)
- VTRs
- patch panels
The master control room in a US television station is the place where the on-air signal is controlled. It may include controls to playout television programs and television commercials, switch local or television network feeds, record satellite feeds and monitor the transmitter, or these items may be in an adjacent equipment rack room. The term "studio" usually refers to a place where a particular local program is originated. If the program is broadcast live, the signal goes from the PCR to MCR and then out to the transmitter.
Other Facilities -
A television studio usually has other rooms with no technical requirements beyond broadcast reference monitors and studio monitors for audio. Among them are:
- one or more make-up and changing rooms
- a reception area for crew, talent, and visitors, commonly called the green room.
Outside -
Outside Broadcast ("OB") refers to any television or radio programme which is broadcast from a location away from the normal studio setting. The location doesn't actually have to be out-of-doors — the "outside" simply means "outside the studio".
Television outside broadcasts can be any size and complexity, from a single camera to dozens of cameras and staff. Generally, the term OB implies multi-camera coverage co-ordinated and directed from a mobile control room.
An "OB Unit" is a mobile production unit (with equipment and crew) which is able to travel to a location and provide broadcast coverage. A simple OB unit could include any of the following:
- A number of cameras (usually at least four)
- A mobile control room, staffed by a director, vision controller, sound operator and VT (videotape) operator
- Equipment and housing for a presentation area
- Transmission equipment
Events commonly covered by OB units include sports, concerts, ceremonies, etc. OB units may specialise in a particular area; for example, a motorsports OB unit would carry specialised camera equipment for in-car coverage and have staff which know this particular sport well.
Using any form of microphone outside the confines of a comfortable and warm studio environment is inevitably going to present a challenge. The elements conspire together to present a formidable list of obstacles to overcome.
Wind, as in life, is the single biggest problem facing a microphone when let loose on an outside broadcast, but moisture comes a close second.
Before you do anything else you should go for the quaintly named “reconnoitre” or recce. Nothing beats a good look at the outside space you are hoping to cover before you start to rig. Take some shots on your mobile to remind you where you are planning to put your resources.
There are usually covered areas for spectators. Plan to use them for your overall ambiance coverage where your principle microphone source may be kept relatively dry. Check that your main ambiance position is not near a source of unwanted noise, like a ventilation duct or PA speaker.
Interviews:
When you’re filming an interview, the audio recording of the interviewee’s voice is the most important element of your production.
It’s so common for filmmakers to spend hours on set design and lighting and only a few minutes on audio. Without sound, all you’re left with is a talking head that does not transmit any message to the viewer.
Having a standard process in how you set up your sound recording and a standard kit of tools you will use, gives you piece of mind that the most essential element of your interview production does not effect the interview’s conversation.
While our audio setup may change depending on the environment we are in, whenever we know that we will be conducting a single person interview, we always carry our standard kit of audio tools that ensure we can record the interviewee’s dialogue in a high quality way.
Great sound quality starts with a great microphone. Just a like choosing a lens, there is a perfect microphone for every occasion. However, for single person interviews there is one type of microphone that you should use 9 times out of 10.
A shotgun microphone.
An example of shotgun microphone is the Rode NTG-3.
The NTG-3 shotgun microphone has what’s called a supercardiod pickup.
Without going too deep into the science of all the various pickup patterns out there, a supercardiod pickup pattern is an audio recording pattern that allows a shotgun microphone to record sound coming from one direction while avoiding prominent pickup of the distracting sounds in the surrounding environment.

In a single person interview, you should point the shotgun microphone in the direction of area around the interviewee’s chin. The microphone should be positioned as close to the interviewee as possible while staying out of frame.
It is also an option to use a shotgun mic AND a lav mic simultaneously, as we always want to have at least one backup audio source.
The problem with lav microphones is that they can often fall victim to interviewee error. The interviewee perhaps rubs their neck itching a scratch and accidentally rubs the microphone off their collar or causes a strange noise in the mic. Maybe you’re using a wireless lav kit and random radio waves start causing interference in your signal.
Also, lav mics can get covered by clothing fabric in a way that muffles the mic’s ability to record properly (this is especially common when after the interview starts, you realize that your interviewee is very animated and loves moving around a lot).
An example of shotgun microphone is the Rode NTG-3.

In a single person interview, you should point the shotgun microphone in the direction of area around the interviewee’s chin. The microphone should be positioned as close to the interviewee as possible while staying out of frame.
It is also an option to use a shotgun mic AND a lav mic simultaneously, as we always want to have at least one backup audio source.
The problem with lav microphones is that they can often fall victim to interviewee error. The interviewee perhaps rubs their neck itching a scratch and accidentally rubs the microphone off their collar or causes a strange noise in the mic. Maybe you’re using a wireless lav kit and random radio waves start causing interference in your signal.
Also, lav mics can get covered by clothing fabric in a way that muffles the mic’s ability to record properly (this is especially common when after the interview starts, you realize that your interviewee is very animated and loves moving around a lot).
Atmosphere:
Ambient sound (AKA ambient audio, ambience, atmosphere, atmos or background noise) means the background sounds which are present in a scene or location. Common ambient sounds include wind, water, birds, crowds, office noises, traffic, etc.
Ambient sound (AKA ambient audio, ambience, atmosphere, atmos or background noise) means the background sounds which are present in a scene or location. Common ambient sounds include wind, water, birds, crowds, office noises, traffic, etc.
Ambient sound is very important in video and film work. It performs a number of functions including:
- Providing audio continuity between shots.
- Preventing an unnatural silence when no other sound is present.
- Establishing or reinforcing the mood.
There are several types of ambient sound used in film production. Their exact names and meanings may vary but these are some common definitions:
- Matching ambient sound: Any ambient sound recorded to match the ambient sound of a scene.
- Wild sound: Background noise with distinct sounds, i.e. more than ambient sound, which is not synchronised with the main vision. Example: Children playing in a playground.
- Buzz track: A general term for ambient sound.
- Room tone: The sound of an empty room, or a room in which all the actors are standing silently.
Live Performances and Conferences:
Use Off-Camera Microphones
The microphone built in to your camera is OK for audio three feet in front of your camera. To capture what's happening on the stage and in the audience you need your microphones there. Ideally the theater will already be miked and you might be able to plug into their audio out. If you're on your own, in the best case scenario you should have at least two mics on the stage and one pointing to the audience to capture their applause. Recording the audio on separate channels will allow you to mix the important parts louder and remove or lower undesired input (you do want to hear the audience clap, you don't want to hear them cough and open potato chip bags). If you absolutely cannot use off camera microphones, look into a directional "shotgun" mic that you can aim at the stage - this will cut down on unwanted noises from other places.
Dialogue & Monologue:
Capturing dialogue is important in a lot of cases, especially when creating a media product. as an example I focused on a short film.
Typically when recording audio in a short film, for the best quality a boom kit will be used. This typically consists of a lightweight extendable pole attached to a wind basket containing a directional mic e.g. Rode NTG1 Shotgun. This creates easy accessible way to record, being able to hold the mic easily with one or both arms a few feet away from the action of the shot without appearing in the shot. This setup is perfect for a small production as it tend to pick up a lot of audio without the mic being directly towards the mouth of the actors, but can in fact be central and will pick up all the contributors dialogue in the shot evenly.
The boom kit brought by the production team comprised a lightweight extendable pole attached to a wind basket containing a suspension-mounted directional Rode mic, which I believe was the lightweight NTG1 shotgun model. The assembly turned out to be perfect for recording the dialogue, as it was light enough to hold and control with one arm and captured a good level from a few feet away.Most importantly, the directionality was not so extreme that it needed turning towards the mouth of an actor; most of the dialogue scenes featured two people talking, but I found that hovering the mic above the couples was all that was necessary to pick up both performers' contributions to the dialogue pretty evenly.
Each time I used the boom mic, I simply connected it to the DR40's mono-specified XLR, set the recorder accordingly and made certain that phantom power was engaged.
The only significant problem I had when recording the dialogue was a physical one, rather than anything to do with record settings: when I had the boom in one hand and the Tascam in the other I had no hands left to adjust my headphones! I found I was constantly taking the headphones off to listen to the director (you can't really swing the boom towards the director every time he or she speaks), and then struggling to get them back on again before filming began, so having a belt-clip holder for the recorder would have made matters much simpler. Still, it is easier to see the metering and operate the transport buttons when the recorder is handheld, so there are pros and cons to every situation.
Some of the scenes in the film involved two actresses sat at a table talking to each other, and their dialogue was particularly important to the story. But at some point in the proceedings we decided to record their dialogue with the general chatter of the extras in the background. I remember thinking everything through the night before filming and quickly concluding that doing such a thing would be limiting in the edit and made a mental note to insist that we captured clean dialogue on set, leaving the hall noise as something to overdub at the editing stage. Nevertheless, in the heat of it all we started doing otherwise, possibly to give the actors something of a realistic vibe in which to work. After reviewing the audio from the first 'table' scene during a moment's down time, I noticed that at times the background noise was getting dangerously high relative to the dialogue, so we requested quieter chat for the next scene.
Group Debate:
With group debates, we have two main problems to overcome: keeping all of the participants on axis in relation to their microphones and avoiding excessive noise from having multiple microphones open at the same time.

With group debates, we have two main problems to overcome: keeping all of the participants on axis in relation to their microphones and avoiding excessive noise from having multiple microphones open at the same time.
However, for those times when we are faced with a large number of people at the table, or the requirement for a very unobtrusive microphone presence, the boundary mic can be an option worth investigating.

Crown Soundgrabber PZM
This type of microphone is available in cardioid, hyper-cardioid, omni, and stereo configurations. Although not ideal for critical recording situations, where the discussion or interview will be used for final release,
Another problem often encountered in recording roundtable discussions is one of a participant striking the table as he makes a point. This is a very natural thing that most people do, but it can be extremely distracting when one listens to the recording. Along with those windscreens, make sure that the mics have proper and adequate shock mounting and isolation.
In this type of discussion, the participants will often have notes with them, and so paper rustle can be an issue. Here is a chance for you to practice your diplomacy to constantly remind them to be very careful when moving paper (a little more on this in a minute, as we talk about mixing strategies for roundtables). Also, if you have a clear line of sight into the studio and can capture the attention of either the offending individual or the moderator, you can use hand signals to warn of the noise problem that you’re having. If you are in a studio situation when recording roundtable discussions, you should consider setting up a cue feed to the moderator, so that you can use the cue as a communications link to quietly mention the problem, and the moderator can signal the offender. Setting up a cue feed for communication purposes is always a good idea when doing this type of recording, so that you can alert the moderator that you’re going to have to pause the recording in 5 minutes, or whatever the case may be.
Audience Interaction & Participation:
Audience recording is both the key and the problem with live recording. It’s sometimes difficult to record the audience in a way that captures its true sound. The transient peaks of the audience makes it not only difficult to capture well, but to isolate from the stage mics as well.
 One technique would be to place a pair of identical mics at about the half-way point between the edge of the stage and the back wall of the venue. Make sure that the mics are placed at least three feet above the audience. Start with the microphones facing directly at one another across the audience, then aim them both down towards, but not exactly at, the middle of the audience.
Audience recording is both the key and the problem with live recording. It’s sometimes difficult to record the audience in a way that captures its true sound. The transient peaks of the audience makes it not only difficult to capture well, but to isolate from the stage mics as well.
Miking the audience lends itself to using omnidirectional mics, but shotgun mics can be especially useful because they help attenuate the intimate conversations from the crowd that happen around where the mic is placed. In the event you have neither type of microphone, just make sure that the mics that you use are identical models.
Mic placement outdoors is a lot more difficult because you have nothing to hang microphones from to get enough distance over the audience. For another thing, you don’t have the ambience of the venue to help you out so you usually have to resort to more microphones as a result.
It’s very easy to have audience microphones overload either from the stage volume of band or the peaks of the audience response. Therefore, it’s a good idea to heavily compress or limit them to prevent overload.
 One technique would be to place a pair of identical mics at about the half-way point between the edge of the stage and the back wall of the venue. Make sure that the mics are placed at least three feet above the audience. Start with the microphones facing directly at one another across the audience, then aim them both down towards, but not exactly at, the middle of the audience.
The higher you get the mics over the audience the better, but if you’re in a club with a low ceiling in a club, you’re better off with placement closer to the audience since the reflections from the ceiling can sometimes sound pretty bad.
Microphone types and characteristics:
 Dynamic:
Dynamic:
The diaphragm is attached to the coil. When the diaphragm vibrates in response to incoming sound waves, the coil moves backwards and forwards past the magnet. This creates a current in the coil which is channeled from the microphone along wires.
A common configuration is shown below:
Capacitor:
 Capacitor microphones are able to respond to very high audio frequencies, and they are usually much more sensitive than their dynamic counterparts. In other words, they require less amplification than dynamic models to produce the same output level from the same signal source, making them more suitable for quieter or distant sound sources. The reason capacitor microphones have such a good frequency response is that their diaphragms can be made much thinner and lighter than those of dynamic models, as they dont have to drag the mass of a voice coil along with them.
 Capacitor microphones are able to respond to very high audio frequencies, and they are usually much more sensitive than their dynamic counterparts. In other words, they require less amplification than dynamic models to produce the same output level from the same signal source, making them more suitable for quieter or distant sound sources. The reason capacitor microphones have such a good frequency response is that their diaphragms can be made much thinner and lighter than those of dynamic models, as they dont have to drag the mass of a voice coil along with them.
Electric Condenser:
The electric condenser microphone uses a special type of capacitor which has a permanent voltage built in during manufacture. This is somewhat like a permanent magnet, in that it doesn't require any external power for operation.However good electret condensermicrophones usually include a pre-amplifier which does still require power.
The electric condenser microphone uses a special type of capacitor which has a permanent voltage built in during manufacture. This is somewhat like a permanent magnet, in that it doesn't require any external power for operation.However good electret condensermicrophones usually include a pre-amplifier which does still require power.
 Ribbon:
 A ribbon microphone, also known as a ribbon velocity microphone, is a type of microphone that uses a thin aluminum, duraluminum or nanofilm of electrically conductive ribbon placed between the poles of a magnet to produce a voltage by electromagnetic induction. Ribbon microphones are typically bidirectional, meaning that they pick up sounds equally well from either side of the microphone.

Carbon:
The carbon microphone, also known as carbon button microphone, button microphone, or carbon transmitter, is a transducer that converts sound to an electrical signal. It consists of two metal plates separated by granules of carbon.One plate is very thin and faces outward, acting as a diaphragm.
Crystal hand-held:

Crystal Hand-Held Microphone:(Research from hyper physics)Crystals which demonstrate the piezoelectric effect produce voltages when they are deformed. The crystal microphone uses a thin strip of piezoelectric material attached to a diaphragm. The two sides of the crystal acquire opposite charges when the crystal is deflected by the diaphragm. The charges are proportional to the amount of deformation and disappear when the stress on the crystal disappears.
Stand:
A microphone stand is a free-standing mount for a microphone. It allows the microphone to be positioned in the studio, on stage or on location without requiring a person to hold it.
Tie-clip:

A lavalier microphone or lavalier (also known as a lav, lapel mic, clip mic, body mic, collar mic, neck mic or personal mic) is a small microphone used for television, theatre, and public speaking applications in order to allow for hands-free operation. They are most commonly provided with small clips for attaching to collars, ties, or other clothing. The cord may be hidden by clothes and either run to a radio frequency transmitter kept in a pocket or clipped to a belt, or routed directly to the mixer or a recording device.

A lavalier microphone or lavalier (also known as a lav, lapel mic, clip mic, body mic, collar mic, neck mic or personal mic) is a small microphone used for television, theatre, and public speaking applications in order to allow for hands-free operation. They are most commonly provided with small clips for attaching to collars, ties, or other clothing. The cord may be hidden by clothes and either run to a radio frequency transmitter kept in a pocket or clipped to a belt, or routed directly to the mixer or a recording device.
 Rifle:
 A shotgun or Rifle Microphone is a long, cylindrical microphone that excels at picking up sounds in front of it, while rejecting sounds to the sides and rear. Shotguns are designed to have a narrower focus than an average microphone.
Shotgun microphones do a great job of picking up the frequencies the human voice produces. Their sound grabbing and voice-capturing abilities make them a great choice for picking up on-camera dialog.

Boom:
A pole carrying an overhead microphone projected over a film or TV set Radio Microphones.
Associated Polar diagrams (omni, cardioid, hyper- cardioid):
Polar Patterns:
The polar pattern of a microphone is the sensitivity to sound relative to the direction or angle from which the sound arrives, or easier worded how well the microphone “hears“ sound from different directions. The most common types of directionality are: Omnidirectional, Cardioid and Supercardioid

Cardioid:
A cardioid microphone has the most sensitivity at the front and is least sensitive at the back. It isolates from unwanted ambient sound and is much more resistant to feedback than omnidirectional microphones. That makes a cardioid microphone particularly suitable for loud stages.

Supercardioid microphones offer a narrower pickup than cardioids and a greater rejection of ambient sound. But they also have some pickup directly at the rear. Hence it is important to place monitor speakers correctly. Supercardioids are most suitable when single sound sources need to be picked up in loud environments. They are the most resistant to feedback.

Omnidirectional:
The omnidirectional microphone has equal output or sensitivity at all angles, this means it picks up sound from all directions. Therefore the microphone has not to be aimed in a certain direction which is helpful especially with lavalier microphones. A disadvantage is that an omni cannot be aimed away from undesired sources such as PA speakers which may cause feedback.
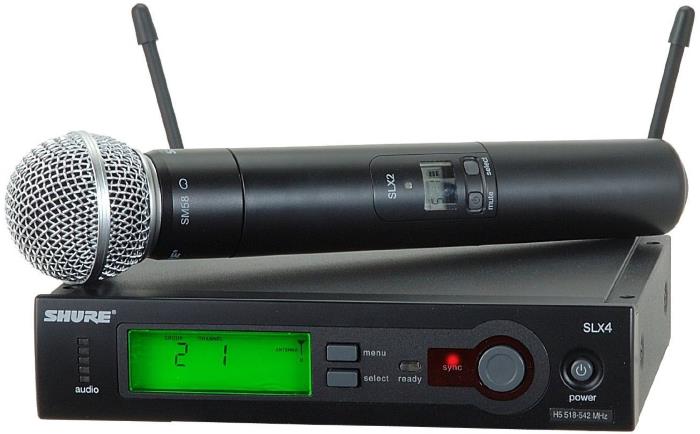
Radio Microphones:
A wireless microphone is a microphone without a physical cable connecting it directly to the sound recording or amplifying equipment with which it is associated. Also known as a radio microphone, it has a small, battery-powered radio transmitter in the microphone body, which transmits the audio signal from the microphone by radio waves to a nearby receiver unit, which recovers the audio. The other audio equipment is connected to the receiver unit by cable. Wireless microphones are widely used in the entertainment industry, television broadcasting, and public speaking to allow public speakers, interviewers, performers, and entertainers to move about freely while using a microphone to amplify their voices.
There are many different standards, frequencies and transmission technologies used to replace the microphone's cable connection and make it into a wireless microphone. They can transmit, for example, in radio waves using UHF or VHF frequencies, FM, AM, or various digital modulation schemes. Some low cost (or specialist) models use infrared light. Infrared microphones require a direct line of sight between the microphone and the receiver, while costlier radio frequency models do not.
Some models operate on a single fixed frequency, but the more advanced models operate on a user selectable frequency to avoid interference and allow the use of several microphones at the same time.
Pre-recorded sources:
 DVD:
DVD:a type of compact disc able to store large amounts of data, especially high-resolution audiovisual material.
DVD uses the MPEG-2 file and compression standard. MPEG-2 images have four times the resolution of MPEG-1 images and can be delivered at 60 interlaced fields per second where two fields constitute one image frame. (MPEG-1 can deliver 30 non-interlaced frames per second.) Audio quality on DVD is comparable to that of current audio compact discs.
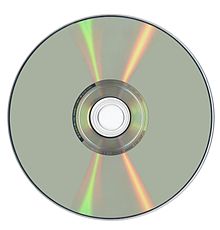
CD:
A compact disc [sometimes spelled disk] (CD) is a small, portable, round medium made of molded polymer (close in size to the floppy disk) for electronically recording, storing, and playing back audio, video, text, and other information in digital form. Tape cartridges and CDs generally replaced the phonograph record for playing back music. At home, CDs have tended to replace the tape cartridge although the latter is still widely used in cars and portable playback devices.
Initially, CDs were read-only, but newer technology allows users to record as well. CDs will probably continue to be popular for music recording and playback. A newer technology, the digital versatile disc (DVD), stores much more in the same space and is used for playing back movies.
Tape:
 The Compact Cassette or Musicassette (MC), also commonly called cassette tape, audio cassette, or simply tape or cassette, is a magnetic tape recording format for audio recording and playback released by Philips in 1962, developed in Hasselt, Belgium. Compact cassettes come in two forms, either already containing content as a pre-recorded cassette, or as a fully recordable "blank" cassette. It was designed originally for dictation machines, but improvements in fidelity led the Compact Cassette to supplant the Stereo 8-track cartridge and reel-to-reel tape recording in most non-professional applications. Its uses ranged from portable audio to home recording to data storage for early microcomputers. The first cassette player (although mono) designed for use in car dashes was introduced in 1968. Between the early 1970s and the early 2000s, the cassette was one of the two most common formats for prerecorded music, first alongside the LP record and later the compact disc (CD).
 Hard disk:

A hard disk is part of a unit, often called a "disk drive," "hard drive," or "hard disk drive," that stores and provides relatively quick access to large amounts of data on an electromagnetically charged surface or set of surfaces. Today's computers typically come with a hard disk that contains several billion bytes (gigabytes) of storage.
MiniDisc:
MiniDisc (MD) is a magneto-optical disc-based data storage format offering a capacity of 74 minutes and, later, 80 minutes, of digitized audio or 1 gigabyte of Hi-MD data. Sony brand audio players were on the market from September 1992 until March 2013.
Sound file formats e.g. MP3:
There are three major groups of audio file formats:
- Uncompressed audio formats, such as WAV, AIFF, AU or raw header-less PCM;
- Formats with lossless compression, such as FLAC, Monkey's Audio (filename extension
.ape), WavPack (filename extension.wv), TTA, ATRAC Advanced Lossless, ALAC (filename extension.m4a), MPEG-4 SLS, MPEG-4 ALS, MPEG-4 DST, Windows Media Audio Lossless (WMA Lossless), and Shorten (SHN). - Formats with lossy compression, such as Opus, MP3, Vorbis, Musepack, AAC, ATRAC and Windows Media Audio Lossy (WMA lossy).
File conversion:
Changing from one file type to another. There are many data conversion programs on the market that support a wide number of video, audio, text, database, spreadsheet and graphics formats.
There are quite a few reasons to convert between formats, but one of the main ones is to do with compatibility.
As-live recordings:
In some cases, bands prefer recording in a live manner as a pose to a multi-track recording. Meaning all the artists want to perform as a band however obtain a true stereo recording. This can be achieved by singling out each element/musician on the track, usually in separate booths which also have a way to communicate with the rest of the band and hear one another input.
This allows the band to not only play together to avoid confusion and save time, it also allows the producers a true stereo recording of each individual musician without picking up any other factors in their recordings as the booth diffuses external sounds.
Live recordings & Concerts:
Recording gigs can be challenging, particularly given the constraints imposed by typical small and medium venues. But capturing a great performance, complete with all the atmosphere of the night, can be a hugely rewarding experience.
Recording a gig presents a unique set of challenges. You may be a dab hand at studio recording, but it doesn't follow that you'll have an easy time recording a gig. You can't ask the band to run through it one more time! It might be similarly challenging for a front-of-house (FOH) engineer, or someone who's in a band and wants to record their gigs. Sure, such people will be familiar with the pressure of a one-chance-to-get-it-right live event, but they'll be less acquainted with the intricacies of recording, and with the threshold of acceptability: a fleeting moment of preamp distortion or feedback might annoy an FOH engineer, but it's not something most listeners will notice (never mind remember), so it's no show-stopper. Yet this sort of thing can spoil a recording.
Interview material:
Interview material consists of the pre recorded questions and then answers for candidates applying for a specific role without attending an interview. Usually the interviewer will send the candidate a pre-recorded disc or storage platform in which the candidate can then record their answers in the allocated time slots.
This can be achieved with a number of softwares on a computer/laptop/tablet or even mobile. This can be directly recorded and even edited in a post production stage to fit the pre-recorded source as it best fits. Typically a condenser microphone would be used for a clear, simple voice response.
Commentary:
On disc-based video formats, an audio commentary is an additional audio track consisting of a lecture or comments by one or more speakers, that plays in real time with video. Commentaries can be serious or entertaining in nature, and can add information which otherwise would not be disclosed to audience members.
Library material:
This area could refer to all types of pre-recorded sources.
Library material can often refer to sample libraries. A sample library is a collection of digital sound recordings, known as samples, for use by composers, arrangers, performers, and producers of music. The sound files are loaded into a sampler—either hardware or software-based—which is then used to create music. Sample libraries appear in a variety of forms:
- As a tempo-based musical phrase that can be looped (repeated in tempo with the arrangement), or edited in a cut and paste collage fashion.
- Collections of note-by-note recordings of musical instruments for playback on a digital sampler, known as multi-samples. This method of sample playback is to construct a playable instrument, or emulation of another instrument, from a sampler or computer.
- One-shot hits or stabs of non-tempo-based audio, particularly for sound effects.
The term sample library, when used in a commercial context, implies a collections of samples that have been produced and licensed for the purpose of being used as samples. Such a library, sometimes called a sample pack, can be distributed either physically (on CD or DVD) or over the internet. Some sampling websites, such as The Freesound Project, utilize user-generated sample libraries.
Individual sample packs can often be found in online libraries or website directories that host the files (free or paid) for download. It is important to know if the samples being utilized are royalty-free or having certain usage restrictions (such as not being allowed in commercial content) when downloading these files. Usually this is stated in the usage rights of the pack or under the Terms of Service on the website they were downloaded from.
Recording Equipment:
Interfaces:
Because an audio interface is, quite simply, what you need to get sound in and out of your computer. If you want to make a good quality recording of your voice or any instrument and hear the results so that you can mix and master your recordings, you will need an audio interface.
An Audio interface has Ease of use and high quality recording – one of the main advantages of an audio interface over on-board sound cards is that, because of the greater physical size and easier accessibility, a wider range of input types can be built into the unit. So, for instance, ¼” jack guitar inputs can be included, as can full XLR microphone inputs, meaning that the device can be capable of connecting to wide range of professional recording equipment. In addition to this, audio interfaces generally feature higher quality audio quality than standard on-board sound cards. Many also have MIDI if you want to connect a keyboard controller too.
Cables and Gain stages:
Cables connect all of your recording equipment, microphones, speakers and musical instruments together. Using good quality cables makes a big difference, not only will the equipment or instrument work better and sound better but it should reduce the chances of interference from outside sources.
In audio engineering, a gain stage is a point during an audio signal flow that the engineer can make adjustments to the level, such as a fader on a mixing console or in a DAW. Gain staging is the process of managing the relative levels in a series of gain stages to prevent introduction of noise and distortion.
Mixer Inputs and Outputs:
The number of input channels in a mixer is extremely important, as this indicates the number
of microphone and musical instrument signals that can be handled. In addition to the number
of input channels in a mixer, it is also important to consider such factors as how many of those
input channels are for microphones, whether line input channels are monaural only, and whether
inputs will accept stereo signals.
For example, when using a mixer with a band, at least eight channels for input may be required
for microphones to pick up the sound of the whole drum kit. In this case, a model that is equipped
with enough channels that are compatible with microphones should be chosen.
A mixer with many stereo channels is useful for connecting multiple devices that output stereo
signals, such as synthesizers. Likewise, a mixer that has built-in effectors, such as compressors
or reverberation, is recommended for situations where audio such as vocals will be input. Finally, a
mixer that is able to connect to a personal computer via USB is recommended for home studio
applications.
Differences between microphone input and line input
- Microphone input channel
Audio signals picked up by a microphone are very weak, so they must be amplified by using the
head amplifier (GAIN) of the mixer. Connect to the MIC connector.
Note: Phantom power (often labelled as "+48V") is required when using a condenser microphone.
- Line input channel
Line level devices such as keyboards and CD players are connected to the LINE connector.
Generally, phone connectors and RCA pin connectors are used in this case.
When both MIC and LINE inputs are available on same channel, use the LINE connector.
When the same connector is used for both MIC and LINE, reduce the level by pushing the PAD
button so that audio is not distorted (Remember line signals have a higher level than mic signals).
Output:
Mixers can output various separate channels of audio, depending on the needs of the event, such as
sending audio meant for the audience to the main speakers and audio meant for the performers to the
monitor speakers on stage:
STEREO OUT is normally used to send signals to the audience; AUX SENDs for performers'
STEREO OUT is normally used to send signals to the audience; AUX SENDs for performers'
monitor speakers and external devices; MONITOR OUT is for monitor speakers used when mixing
audio in the studio; GROUP OUT for outputting several signals together; REC OUT for connecting
with recording devices; and PHONES for connecting headphones.
(1) AUX bus
The AUX bus is a circuit used to send signals to external devices. It can be used to send signals to
performers' monitor speakers separately from the main output, or to send signals to external effects
and recording devices. A mixer with many AUX sends should be chosen if there are many people
in the band or if separate monitor signals with individual balances need to be sent to the performers.
(2) GROUP bus
The GROUP bus is a circuit for controlling multiple channels at once. For example, if there are
eight microphones (for eight channels) placed around a drum set and you want to raise or lower the
volume of the entire set, it would be difficult to accurately raise or lower the faders for all eight
channels. If these channels are all set to a single group, the volume of the entire drum set can be
raised or lowered, while maintaining the same balance, merely by raising or lowering the fader
for the group.
(3) STEREO bus
The STEREO bus is a circuit for combining each input coming into the mixer or each GROUP
bus signal, adjusting the overall level, and outputting the audio through stereo output connectors.
Audio signal flow is the path an audio signal takes from source to output.The concept of audio signal flow is closely related to the concept of audio gain staging; each component in the signal flow can be thought of as a gain stage.
In typical home stereo systems, the signal flow is usually short and simple, with only a few components. However, in recording studios and performance venues, the signal flow can often be quite complicated, with a large number of components, each of which may cause the signal to fail to reach its desired output. Knowing each component in the signal flow becomes increasingly difficult and important as system size and complexity increases.
Feedback, also called "Howl-Round," occurs when the output of a device is accidentally connected to its input. If the device is amplifying the signal, then the amplified output will be fed back into the input, where it will be amplified again and sent to the output, where it will return to the input, be amplified again, and sent to the output, ad infinitum. An understanding of signal flow is important in preventing feedback.
Levels;
Both gain and levels refer to the loudness of the audio. However, gain is the input level of the clips and volume is the output. In recording audio, gain is the first control that the microphone signal goes through in a mixer while levels are adjusted after that.
Metering and Monitoring:
Loudness monitoring of programme levels is needed in radio and television broadcasting, as well as in audio post production. Traditional methods of measuring signal levels, such as the Peak programme meter and VU meter, do not give the subjectively valid measure of loudness that many would argue is needed to optimise the listening experience when changing channels or swapping disks.
The need for proper loudness monitoring is apparent in the loudness war that is now found everywhere in the audio field, and the extreme compression that is now applied to programme levels.
VU
Mic preamps, converters, hardware effect processors are all designed to work optimally at 0 VU. They can usually handle more than that before distorting, but 0 VU is where the signal to noise is best.
Mic preamps, converters, hardware effect processors are all designed to work optimally at 0 VU. They can usually handle more than that before distorting, but 0 VU is where the signal to noise is best.
VU stands for Volume Unit and is the oldest analog metering system. VU meters are relatively slow moving with at 300ms response time. This slow response of a VU meter better represents an averaged volume level close to how our hears work. 0VU is equal to +4dBu or professional line level.
dBu
The dBu scale measures the analog voltage level in our equipment with 0dBu calibrated to about 0.775 Volts. The u in dBu stands for ‘unloaded’ which means that the voltage is measured with a zero resistance load.
The dBu scale measures the analog voltage level in our equipment with 0dBu calibrated to about 0.775 Volts. The u in dBu stands for ‘unloaded’ which means that the voltage is measured with a zero resistance load.
Again, 0VU or +4 dBu is the ideal constant voltage of all your analog components in the recording and monitoring chain.
Here’s an example chain – microphone, mic preamp, compressor, audio interface line input, Analog to digital converter, recording software.
The microphone signal gets boosted up to line level by the preamp. Line level goes into and out of the compressor into the audio interface. The analog to digital converter assigns bits representing the voltage coming in and sends the data to your DAW.
Digital Meters
Once it’s in your DAW the level you see will not be 0 on your track meters, it will actually be closer to -18 dBfs depending on the calibration. This may seem like a really low level but this is actually the optimal level that all the analog components that come before it.
Once it’s in your DAW the level you see will not be 0 on your track meters, it will actually be closer to -18 dBfs depending on the calibration. This may seem like a really low level but this is actually the optimal level that all the analog components that come before it.
Once you build up your song with several other tracks, you’ll be happy you have that extra headroom and lower noise floor.
0VU = +4 dBu = -18 dBFS
This is the only thing you need to remember
dBFS
The dBFS meters show Decibels relative to full scale. Instantaneous digital levels below the 0dBFS absolute peak. When 3 consecutive samples pass 0 the clip light will come on.
The dBFS meters show Decibels relative to full scale. Instantaneous digital levels below the 0dBFS absolute peak. When 3 consecutive samples pass 0 the clip light will come on.
dB RMS
Now what’s left is RMS metering. Some DAWs have this in addition to Peak metering on the master. Similar to how VU meters work, RMS meters show an average level. The RMS value relates to how loud a sound is perceived.
Now what’s left is RMS metering. Some DAWs have this in addition to Peak metering on the master. Similar to how VU meters work, RMS meters show an average level. The RMS value relates to how loud a sound is perceived.
These days all music is mastered to peak just below 0 dBFS, the unwritten standard is -0.3, but the song with the higher RMS level will appear to be louder.
The Integrity of the Sound Signal:
Signal integrity or SI is a set of measures of the quality of an electrical signal. In digital electronics, a stream of binary values is represented by a voltage (or current) waveform. However, digital signals are fundamentally analog in nature, and all signals are subject to effects such as noise, distortion, and loss. Over short distances and at low bit rates, a simple conductor can transmit this with sufficient fidelity. At high bit rates and over longer distances or through various mediums, various effects can degrade the electrical signal to the point where errors occur and the system or device fails.
Direct Injection:

A DI unit is an electronic device typically used in recording studios and in sound reinforcement systems to connect a high-impedance, line level, unbalanced output signal to a low-impedance, microphone level, balanced input, usually via an XLR connector and cable. DIs are frequently used to connect an electric guitar or electric bass to a mixing console's microphone input jack. The DI performs level matching, balancing, and either active buffering or passive impedance matching/impedance bridging to minimize unwanted noise, distortion, and ground loops.
DI boxes are extensively used with professional and semi-professional PA systems, professional sound reinforcement systems and in sound recording studios. Manufacturers produce a wide range of units, from inexpensive, basic, passive units to expensive, sophisticated active units which provide numerous features and user-controllable options and settings and rugged, heavy duty chassis. In the 2000s, some higher cost bass amplifiers have built-in DI units, so that the bass amp's output signal can be connected directly to a mixing board in a sound reinforcement/live show or recording context.
Multitrack recording (MTR)—also known as multitracking, double tracking, or tracking—is a method of sound recording developed in 1955 that allows for the separate recording of multiple sound sources or of sound sources recorded at different times to create a cohesive whole.
Before the 1950s, recording a song always depended on musicians and singers performing over and over again together until they got the "perfect" take -- or at least the best. In this tedious process, if someone made a mistake, everyone had to start all over again.
This was the case until musician and innovator Les Paul started experimenting with recording over himself so that he could play multiple parts in the same song. In 1954, Paul convinced a company that made recorders, Ampex, to build him a 3-track recorder. This was the first multitrack recorder, which allows different "tracks" or channels of sound to record and playback synchronously (the vocals on one track, guitar on another, and so on). Each track can be rerecorded or deleted without affecting the other tracks.
Now, the 24-track recorder is standard. But these can even be linked together to have 48 or 72 tracks if necessary.
Stereo and Single Track Recording:

Stereo recording is a technique involving the use of two microphones to simultaneously record one instrument. The mono signals from each microphone are assigned to the left and right channels of a stereo track to create a sense of width in the recording.
Stereo recording is recording onto two separate channels, one channel for the left sound input and the other channel for the right sound input. With stereo, recording on the two channels are independent of each other, and, thus, the channels can record completely different signals at a given time. This makes stereo recording dynamic, since it can produce different distinct sounds on the left channel and right channel. This is in contrast to mono recording, which is recording onto one single channel (no separate two channels for left and right inputs).
Single Track Recording:
Mono recording is recording that is done on one single channel. This is in contrast to stereo recording, which is recording done on two separate channels composing of left and right sound inputs.
Mono recording is the most commonly used type of recording. Although it may seem like stereo recording may always be the better option to record in, since there are two channels of left and right sound inputs instead of only the one which mono uses, for many applications, recording in stereo is completely unnecessary. Mono recording is used a great deal of the time, especially when a user is recording static speech. Dynamic music, for the most part, almost always uses stereo to record all the different elements in music to create the surround sound effect, but for static applications, such as when using dictating speech in speech recognition programs or when recording a plain text message, mono is used, with stereo offering no further advantage.
Mono recording is more common than stereo recording because most recording devices are one-microphone devices. Unless the recording device being used is specifically an array microphone, it can only record in mono, since it doesn't have multiple microphones to record on different channels. Unless desiring surround sound recording, for most general applications, mono recording is sufficient to meet a user's needs.
Analogue Recording:
In the simplest of terms, magnetic tape consists of a thin layer of Mylar or similar material coated with iron oxide. The tape machine head exerts a charge on the oxide, which polarizes the oxide particles and effectively "captures" the signal. It's a process that creates some interesting byproducts, many of which directly influence the sound of the recording.
Probably the most commonly cited chracteristic of analog recording is its "warmth." Tape warmth adds a level of color to the sound, primarily softening the attacks of musical notes, and thickening up the low frequency range. Recording at slightly hot levels to analog tape can also produce a nice distortion that works well with certain types of music such as rock, soul, and blues.
Thomas Edison is credited with creating the first device for recording and playing back sounds in 1877. His approach used a very simple mechanism to store an analog wave mechanically. In Edison's original phonograph, a diaphragm directly controlled a needle, and the needle scratched an analog signal onto a tinfoil cylinder:
You spoke into Edison's device while rotating the cylinder, and the needle "recorded" what you said onto the tin. That is, as the diaphragm vibrated, so did the needle, and those vibrations impressed themselves onto the tin. To play the sound back, the needle moved over the groove scratched during recording. During playback, the vibrations pressed into the tin caused the needle to vibrate, causing the diaphragm to vibrate and play the sound.
Today, even people that totally prefer the sound of analog tape might use it only to record selected elements, such as a drum kit, and when it has been recorded, they usually transfer it straight over to digital as they listen back.
Digital Recording:
The first digital recorders didn’t sound very good. The reason for that was partly because digital storage was expensive, as was processing power, which led to the use of low bit and sample rates, (to use less data) and partly because the AD-converters were new and hadn’t yet matured as a technology.
Today, these problems are completely solved. Both processing power and storage has gotten many orders of magnitude cheaper, and the AD converters have gotten much, much better. I would say, to the point of being a non-issue. Add to that the convenience factor. Digital copies don’t degrade the way analog copies do. They can be edited and processed in ways that are completely impossible with analog. Imagine cutting real tape in order to move an early snare drum hit to where it belongs on the grid, never mind pitch and time stretching technology such as Celemony’s Melodyne software that allows a producer to create new harmonies from a lead vocal, change the phrasing, fix the pitch etc, with no noticeable artifacts (as long as it’s done correctly by someone who knows what they’re doing).
In digital recording, audio signals picked up by a microphone or other transducer or video signals picked up by a camera or similar device are converted into a stream of discrete numbers, representing the changes over time in air pressure for audio, and chroma and luminance values for video, then recorded to a storage device. To play back a digital sound recording, the numbers are retrieved and converted back into their original analog waveforms so that they can be heard through aloudspeaker. To play back a digital video recording, the numbers are retrieved and converted back into their original analog waveforms so that they can be viewed on a video monitor, television or other display.Linear & Non-Linear:
In the early days of electronic
video production, linear (tape-to-tape) Editing was the
only way to edit video tapes. Then, in the 1990s, non-linear
editing computers became
available and opened a whole new world of
editing power and flexibility.
Non-linear editing was not welcomed
by everyone and many editors resisted The new wave.
In addition, early digital video was plagued with performance issues and uncertainty.
However, the advantages of non-linear video eventually became so overwhelming
that they could not be ignored.
In the 21st Century non-linear
gained dominance and linear editing headed towards obsolescence.
During this time the description "non-linear" was slowly abandoned as
it was no
longer necessary—almost all editing was now digital and the
"non-linear" aspect was assumed.
Linear was dead.
Until around 2008 we recommended
that aspiring editors still made the effort to learn about
traditional tape-to-tape
editing, for reasons including the following:
It was simple and inexpensive.
There were very few complications with formats, hardware conflicts etc.
Some simple jobs (e.g. appending
one video to another) were much quicker and easier with linear editing.
Interestingly, many professional
editors of the time claimed that those who learn linear editing first tend to
become better all-round editors.
By 2010 we felt is was no longer
necessary for most editors to know how to work with tapes, although we'll never
discount it completely. Even for the sake of understanding the historical
development of digital media, it's not a bad investment of your time to learn
about linear editing.
When it's working properly nonlinear editing is overwhelmingly superior to linear in three ways that you might label trial composite, additive processing, and auto revision.
First, the preview mechanism creates a trial composite version that tests all your cuts, effects, and titles. In linear editing, by contrast, each cut, dissolve or supervision goes straight to the record tape. If a dissolve is too short, you have to set everything up and try it again--and again and again, until you're satisfied.
In nonlinear editing, just drag the dissolve symbol to expand it, make a new preview, and check the effect. The whole process takes maybe ten seconds. By trial compositing piece-by-piece, you can fine-tune your work on the fly.
Even more exciting is additive processing --the ability to do one thing, then add another layer and another to create greater richness and depth. (This is particularly powerful in sound editing, where you can build and balance literally scores of separate track layers.)
Working on linear systems, beginners are often dismayed to learn that they can't go back and super titles over edited live action or add narration to their production sound. In linear editing you must prepare, blend and record all your visual (and most of your audio) elements in a single pass through the mixers. You can't keep adding elements to previous combinations until you get the composite just the way you want it.
Finally, auto revision lets you make a change anywhere--even at the start of the show--without having to re-lay everything downstream of it. In linear editing, if shot three runs too long, there's only one way to shorten it: re-record it and then re-lay shots four through 300 or whatever, all over again.
Admittedly, linear editing can be done in conjunction with a computer that prepares an EDL (edit decision list) and automates the re-recording of shots four through X. But the hardware still has to roll back or forth to find each shot, set up the effects, and re-record in real time. In nonlinear editing, by contrast, all the materials are instantly accessible on the hard drive instead.
Final Products:
https://soundcloud.com/user-993214192/sets/sound-production-portfolio1
Sources:
https://en.wikipedia.org/wiki/Television_studio
http://www.mediacollege.com/video/outside-broadcast/
https://filmmakeriq.com/2013/12/how-to-record-audio-for-an-interview/
http://www.mediacollege.com/audio/ambient/
https://www.videomaker.com/article/c10/14225-how-to-video-record-live-events
http://www.audioundone.com/recording-roundtable-discussions
http://www.shure.eu/support_download/educational_content/microphones-basics/microphone_polar_patterns
https://en.wikipedia.org/wiki/Wireless_microphone
http://searchstorage.techtarget.com/definition/DVD
http://brodiac.tripod.com/storage.htm
https://en.wikipedia.org/wiki/Compact_Cassette
http://searchstorage.techtarget.com/definition/hard-disk
https://en.wikipedia.org/wiki/MiniDisc
http://www.soundonsound.com/techniques/recording-live-show
https://en.wikipedia.org/wiki/Audio_commentary
https://en.wikipedia.org/wiki/Sample_library
https://www.musicrepo.com/what-is-an-audio-interface/
http://www.recordproduction.com/recording-equipment-cables.html
http://www.yamahaproaudio.com/global/en/training_support/selftraining/pa_guide_beginner/mixer/
https://en.wikipedia.org/wiki/Audio_signal_flow
https://en.wikipedia.org/wiki/Loudness_monitoring
https://en.wikipedia.org/wiki/Signal_integrity
https://en.wikipedia.org/wiki/DI_unit
https://en.wikipedia.org/wiki/Multitrack_recording
https://ehomerecordingstudio.com/stereo-microphone-techniques/
Btecsoundolivercharles: Unit 17: Audio Production Processes And Techniques - Capture Environment >>>>> Download Now
ReplyDelete>>>>> Download Full
Btecsoundolivercharles: Unit 17: Audio Production Processes And Techniques - Capture Environment >>>>> Download LINK
>>>>> Download Now
Btecsoundolivercharles: Unit 17: Audio Production Processes And Techniques - Capture Environment >>>>> Download Full
>>>>> Download LINK PQ